It took a while, but it's finally done (almost)
In May this year, we started a project to replace the aging roof on Upper Goose Pond Cabin (UGPC).
Somewhat naively, we figured it would take maybe 5-6 days to get this done, but as these things sometimes go, it took about twice that. Here's what we did.
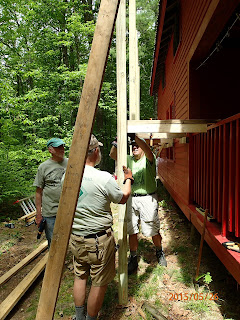 |
| Scaffold assembly |
 |
| Scaffold complete on the first side |
Under that, we found not one, but two layers of asphalt shingles, that also had to be stripped off. We had two special shovels with teeth on the front, designed to rip up shingles and pull the nails. The trick was not falling off the roof while using them.
 |
| Roof brackets provide a work platform to strip the old roofing |
 |
| First side in process |
Eventually we were able to get a pretty clean surface down to the original cabin roof boards.
Of course, we needed to be ready for rain with half of the roof stripped off the cabin, so at the end of every day we covered the roof with a giant tarp, which mostly worked.
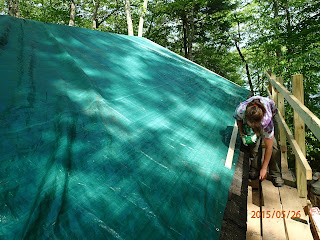 |
| A tarp to keep out the rain |
On the two project days when it did rain, we did clean up duty on the mountain of old shingles at the bottom of the scaffold, bagging them and dragging them down the hill to a holding area near the beach.
 |
| Rainy day clean up |
An unexpected side effect of the work was a veritable rain of grit and dust from the old shingles sifting its way through the roof boards an onto everything in the bunk room.
Eventually, we stapled plastic sheeting to the underside of the rafters, which kept most of the crud contained.
Once the roof boards were completely cleared, we found several that were rotting, mostly around the chimney, where the roof had been leaking for years.
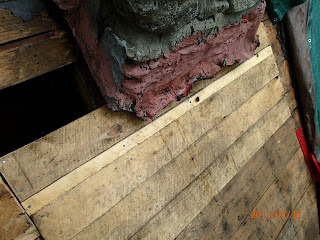 |
| Patching the old roof |
A new layer of roll roofing was laid down over the clean boards. Once in place, the backing was peeled off and the large pieces were stuck down to the roof. This roll roofing will seal around nails or screws used to fasten down the finished roofing material, providing an extra layer of water protection. We discovered that the roof boards had to be scrupulously clean to allow the roll roofing to adhere.
Finally, it was time to put the new metal roof pieces on the roof. Having been ferried in by canoe the previous fall, and stored in the boat shed,
| Metal roof ready to go |
| Precision work |
Now all we had to do was take down the scaffold and reassemble it on the south side of the cabin, and do it all over again. Since we used all of our planned project days in late May and early June on just the one side, we took a hiatus until the bulk of the hiker traffic wound down in late August, and to complete the rest of the trail projects scheduled for the season. Even then, there were days when keeping hikers out from underfoot became an ongoing problem.
The second half of the roof went a bit faster, as we had figured out most of the problems on the first side. Fairly quickly we had new roofing on the north side, and all that remained was to cover the gap between the field stone chimney and the new metal roofing.
To facilitate this work, we constructed a work platform that straddled the peak of the roof and hung down on both sides of the chimney.
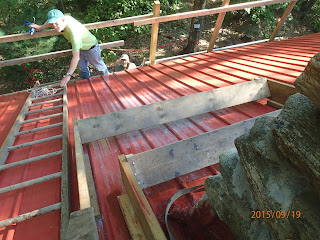 |
| Chimney work platforms and ladder |
Lead flashing was chosen for its ability to be easily molded to the rounded fieldstones of the chimney and the ridges of the metal roofing. Cut in to smaller pieces and bedded down in roofing cement (fondly referred to as "bear shit"), the lead was easily contoured and went in fairly easily.
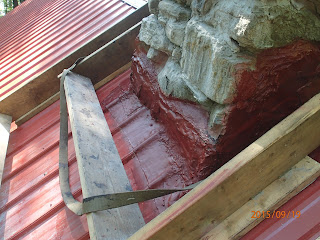 |
| Lead flashing in place and painted. Also a strap used to secure workers while they are on the platform |
It took 12 days, twice as long as we expected, to complete this project. Over 250 volunteer hours were spent, assisted by about 40 more hours from DCR and ATC staff on various work days--and we still have a solid day of waste disposal ahead of us. We do have a roof that we expect to last many decades, and be resistant to the normal barrage of small limbs that inevitably land on any roof in the woods. Plus it looks great!
UPDATE, October 17: As we start to close the cabin for the season, volunteers removed almost two tons of old roofing material via motor boat and trucked it to the disposal facility. All that remains are the sheets of old Onduline which will go out next spring. Our roof got a good testing in the heavy rains we've had recently--no leaks so far. We'll see what the winter snow and ice brings...
Nice blog, very nice information you have shared. Best Chimney Scaffolding agency in Arundel offers Birdcage Scaffolding and Chimney Scaffolding in Arundel. Call Today!
ReplyDeletescaffolders in Portsmouth