Thursday, September 13, 2012

Race Brook Bridge Repair

Tuesday 4 intrepid souls, Dave Koerber, Don Fairbanks, Richard Wanderman and I made the long climb up the Race Brook trail to the site of a decayed bridge upstream of the upper falls.  For those who might not have seen this bridge, below you see it in better days with Loren Kahn and Dave McCullough making good use of it:

Below is the bridge as we found it on Tuesday.  Removal of the remains was pretty straight forward and rebuilding the abutments took most of the time.  We used rock to build up the abutments so that the new sills will rest only on rock, not soil, which should lengthen the life of the new bridge.


While Dave and Don worked on this end of the business, Richard and I worked to fell the first tree we had selected for the new bridge.  It was a nice straight hemlock, about 13" diameter at the butt and an easy felling job.  The existing bridge was made from much smaller timbers contributing to it's short life. 

Once down we limbed it up and started the debarking effort.  It sure is easier to debark in the spring when the sap is flowing well.  It was slow tedious going.

To fell the second tree we had selected we needed to move the first log harvested out of the felling area.  It took all 4 of us on the log carriers moving about a foot at a time to slowly manuver it out of the way and towards it's ultimate destination. 

With this log out of the way we set to felling our second tree.  This did not go as smoothly as the first tree and fell in an awkward direction and hung up on a nearby tree.  All hands were safe as we had taken precautions for this possibility and I believe we can safely get this tree down with a bit of effort and some additional tools.  This will be our first order of business when we return to resume work. 

As we were getting a bit tired from our efforts and the 4 o'clock whistle was about to sound we gathered our tools up and headed back down the hill, satisfied with a good days work.

The Hobbit Bridge

Saturday September 8, 2012

Bridge and bog bridges south of Shays Rebellion.

On Saturday morning (leading into a very rainy afternoon) Don, Dave and Cosmo met to start replacing and re-building bog bridges in the "Mosquito Coast" area of the Housatonic Valley.  We were joined at lunchtime by Jim and Christine in from other events in the area.  Christine is the maintainer for this section of the AT.

This long, flat section of the AT links the Riga Plateau and Jug End in the southern Taconics to East Mountain and the southern end of the Berkshires that the AT rides north to Vermont.

The AT crosses the valley on land purchased for the Trail by the National Park Service in the 1980's as part of the effort to get the AT off of roads and onto permanently protected lands.   Some of the land here is in active agriculture, while other sections are more marginal--you could call it a swamp.  To get hikers through these low, wet areas, a network of bog bridges, board walks and bridges stitches the trail together between farm land, low hills and abandoned fields.

The wet, swampy land is a perfect habitat for winged insects, always on the lookout for fresh mammalian blood to provide a shot of protein to produce their next generation.  This can come as a bit of a shock to hikers used to the breezy ridges of the surrounding mountains.

We set this project on the schedule near the end of the summer, hoping to miss the worst of the swarms.  This year's minor drought helped keep the population down as well.

Hubbard Brook Bridge
When the AT first went off of the local roads, one of the major obstacles was crossing Hubbard Brook and it's associated wetlands.  The AT Committee built a major span and extensive boardwalk over the brook when the land was first acquired, and as the Trail continued south into the woods, installed approximately 30 sections of bog bridge over low spots and minor drainages between the brook and Rt 41 (Undermountain Rd). 

Now, some 20 years later, some rehabilitation and fix up is needed.  At the time, the Committee used a new material, 'plastic lumber'.  In those days before Trex became common on decks and patios, this material looked like a good choice for installation in areas where native timbers would quickly rot and require frequent replacement.  This material has survived well, but is slippery when wet and so flexible that it sags considerably between supports. 

The Hobbit Bridge (note path worn by hikers alongside it)
Our mission today was to shore up some of the most saggy parts, install some new sections where muddy areas persist and (regretfully) replace the "Hobbit Bridge", a construction that makes excellent use of the floppy qualities of the planks, but is so slippery that hikers bypass it in favor of the muddy stream bank.  We've replaced it with a considerably less charming 12ft long box bridge made from pressure treated 2x10's. It will last a long time in the shady swamp and be a bit less challenging to cross. 

Christine and Don complete the framing on the replacement bridge


The completed (boring) bridge


There is no intent to make the AT completely safe.  That would be impossible--and depends a lot on what one considered 'safe' to be.  Statistically, hikers (and volunteers)  are in more danger driving to the worksite or trailhead than they are working or hiking.  However, when hikers 'vote with their feet' and bypass a trail structure in such a way that damages the surrounding environment or widens the footpath, trail clubs must take measures to prevent or reduce impacts from trail visitors--hence, sadly, the demise of the Hobbit Bridge.


Don (invisible in his dark raingear) and Dave relocate an existing bog bridge
Rot-resistant Tamarack for new bog bridges awaits


In other work this rainy afternoon, we carried in the remaining bog bridge materials and began work on rehabilitating the sagging existing ones.  We'll have another visit to the area on Sept 29th to finish this project.


Friday, September 7, 2012

Race Brook Hemlocks

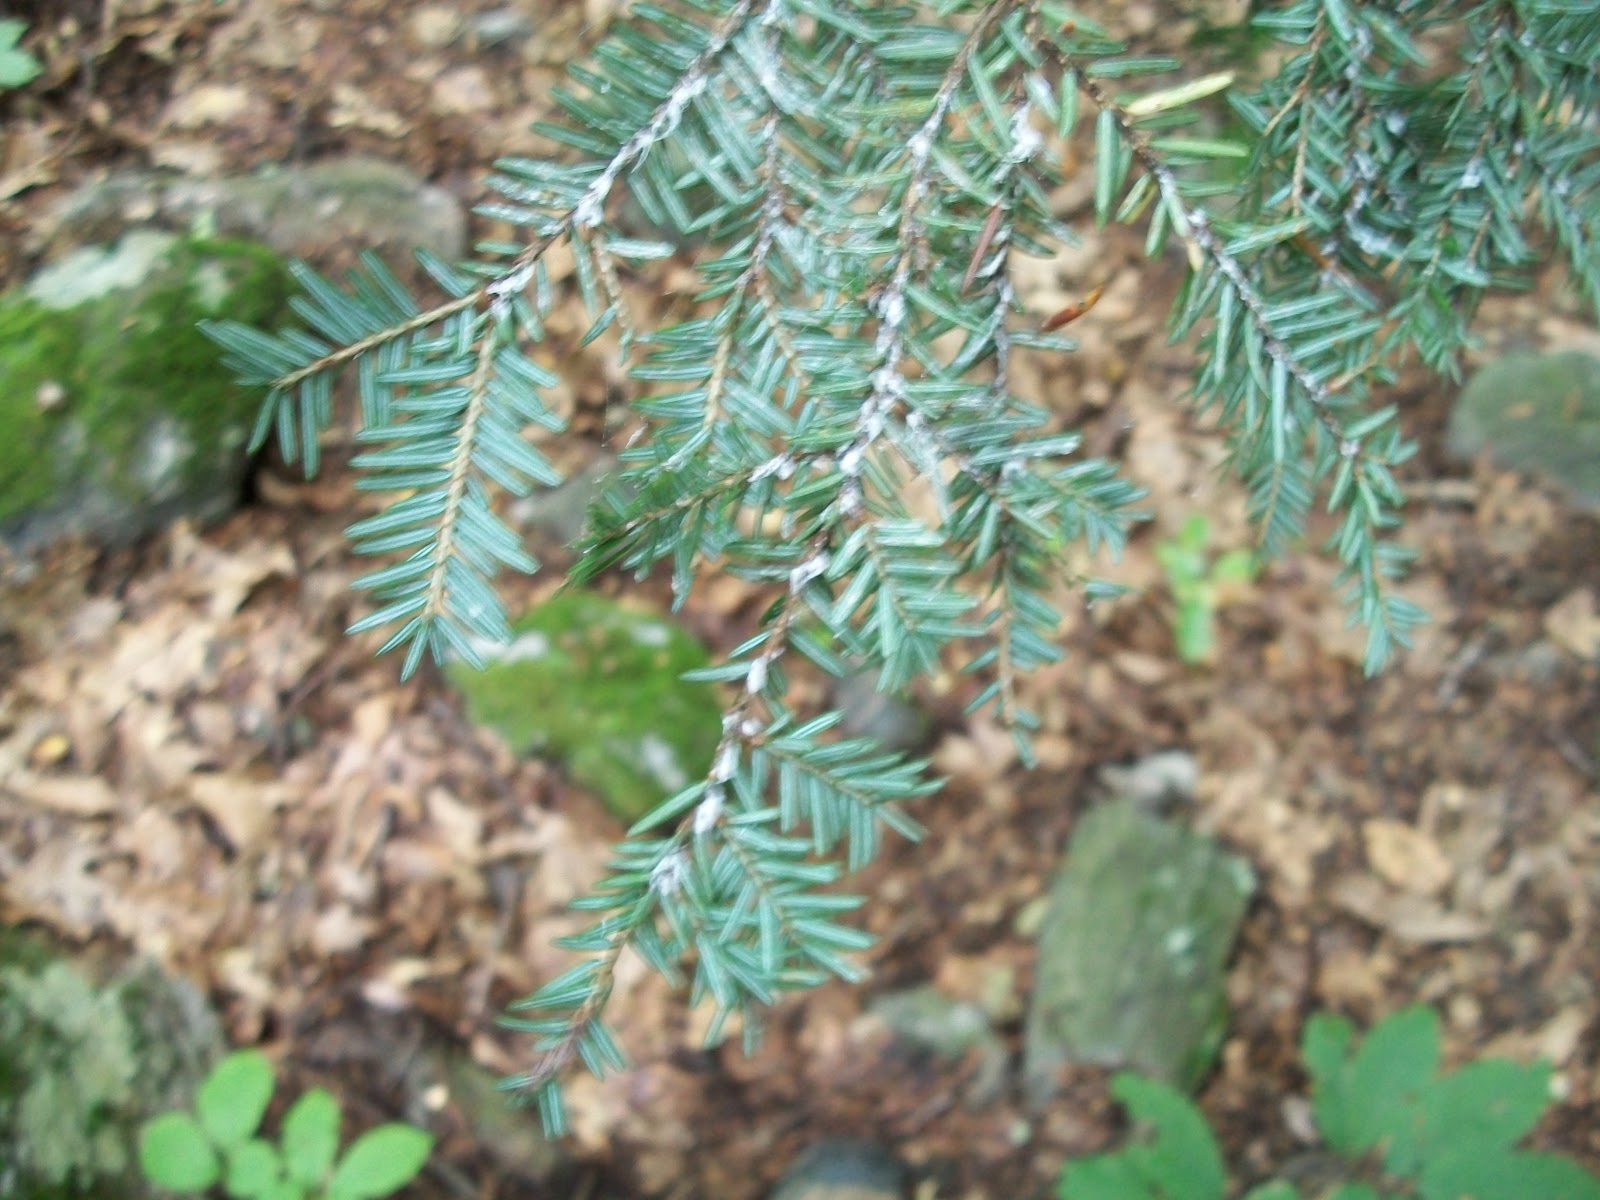
Earlier this week I took a hike up the Race Brook Trail to scout the repair to the log bridge over the brook and check in at the campsite.  Shortly after leaving the trailhead on Rt 41, I was in the stately hemlocks along this trail and noticed that there was more sunlight reaching the forest floor than I had remembered from a couple of years ago.  My concerns were soon confirmed when I turned some low hemlock twigs over and found the white specs of wooly adelgids.  The US Forest Service says:

 Native to Asia, the hemlock woolly adelgid (Adelges tsugae) is a small, aphidlike insect that threatens the health and sustainability of eastern hemlock (Tsuga canadensis) and Carolina hemlock (Tsuga caroliniana) in the Eastern United States. Hemlock woolly adelgid was first reported in the Eastern United States in 1951 near Richmond, Virginia. By 2005, it was established in portions of 16 States from Maine to Georgia, where infestations covered about half of the range of hemlock. Areas of extensive tree mortality and decline are found throughout the infested region, but the impact has been most severe in some areas of Virginia, New Jersey, Pennsylvania, and Connecticut.
 
Here's a picture of what I found (sorry it's a little fuzzy, the best my camera could muster):
 I suspect the infestation started some years ago unnoticed and perhaps has come to light with the additional stressor of the drought we've experienced this year.  Some trees are already near skeleton trees:
We have alerted our partners at ATC and NPS of this situation.  As this infestation spreads and kills the large hemlocks in the area it will undoubtedly have impacts on the vegetation in the area.  This is the first sign of this pest on AT lands in Massachusetts that I am aware of. 


Monday, August 27, 2012

Aug 25, Bog Bridging on Mt Greylock

Saturday Aug 25th, Bog Bridge Install, North of Mt Greylock

We loaded up the truck from our materials storage area near the Mt Greylock Visitors Center.  We had about 40 pieces of lumber to carry in to the work site on the AT just north of the Bellows Pipe Trail junction.

Loaded up and ready to go.


Bog bridging (also known a puncheon) is used to carry hikers over intermittent wet or muddy areas along the Trail.  The goal is not to keep hikers feet clean, but to keep hikers from widening the footpath as they try and walk around wet and muddy areas.  If left un-bridged, these areas will just become wider and wider, creating increasing impacts on the adjacent vegetation. 

Whenever we can, we try and resolve the problem by improving the drainage, or installing large step stones, but this is not always possible in very we areas, or locations where water is collecting on top of bedrock.

Bog bridging lasts about 10 years and tends to stay on top of muddy areas, rather than sinking in.  In remote locations, we prefer to use native trees cut from the nearby forest.  However, this is time consuming, and eventually we will run out of suitable trees.   In most AT locations in Massachusetts, it is possible to use rot resistant rough sawn lumber from local saw mills.  Tamarack (also know as Larch) and Black Locust are preferred species, as they are modestly priced and are naturally resistant to decay.  This does mean that we need to carry in materials for most bog bridging work.
Don and Dave bring in some planks
Sim carries in a base timber


In some locations, we have used man-made materials such a Trex or similar products.  While they last a very long time, they are expensive, heavy, and look very unnatural in the back country.    We also try and avoid pressure treated lumber, as we hesitate to introduce poisons into the local environment.  We've also found that PT lumber can dry out and split in direct sunlight.

Dave and Sim replace some missing planks
On today's project, two sites were replacements of existing bog bridging where the planks had rotted off of the base timbers.  Four other sites received new bog bridging, as they are showing signs of widening.

Don and Greg set some step stones


At two other sites we added stepping stones leading on and off of an existing set of bog bridging.  This protects a slightly longer wet section not quite covered by the existing bridging.

Sunday, August 19, 2012

Painting Upper Goose Pond Cabin

August 18th.  Paint for Upper Goose Pond Cabin.

This Saturday, we took advantage of the great weather to get started painting the exterior of the Cabin.  Dave, Don and Cosmo, plus Dave's granddaughter arrived a little after 9am with paint, brushes, scrapers and dropcloths ready to work on the west side of the Cabin.

Our long term plan is to paint one side a year, and we decided to start with the west side, as that sees the worst of the weather.

Don and Dave remove all the loose paint.
We started off scraping off any loose paint, there was quite a bit on the lower half of the wall, as the roof overhang kept the upper part fairly well protected.

Almost done.

Then we opened the paint.  This is all about RED.  We chose "Heritage Red", but this stuff looked even more brilliant out here that it did in the store.  We think it will weather to a slightly less brilliant hue.  The photo's show it a bit more orange than it really is.  The yellow splotches are sunlight coming through the trees.  It actually looks pretty nice, and it will be hard to miss in any weather conditions.


We were wrapped up about 2pm, we'll tackle the next side in 2013.

A thing of beauty.

Wednesday, August 15, 2012

Upper Goose Pond Cabin Access Gate

August 14, Access Gate Repairs--Upper Goose Pond Cabin

The gate at Rt 20 that controls vehicular access to the Upper Goose Pond Cabin Caretaker's trailhead has sagged to the point where it has not been able to lock for the past several years.

To control motorized access to the Cabin and adjacent AT Corridor lands, we received permission from MassHighway to restore the gate to lockable condition and install a combination lock.  The gate will normally be locked, except during deer hunting season, and the combination transmitted to UGPC Caretakers, and local emergency responders.  The combination can be changed as needed.  The gate does not impede foot travel.

This Tuesday, Pete and Cosmo brought a load of supplies and gear to the worksite.  Fortunately, we were able to drive close to the gate since we not only had the usual digging tools but a small concrete mixer, 700lbs of concrete mix and about 20 gallons of water.
The First Load

Once we got situated, we proceeded to dig out the ground around the hinge post of the gate.  We had originally thought that the post was just set into the ground, but soon found it had been set in concrete--'tho not nearly enough concrete to support the long swing arm of the gate.

While Cosmo made the initial excavation, Pete set a ground anchor to support a wire rope backstay that will help the hinge post stay vertical.
 Fortunately, digging was fairly easily, as the entire area was mostly sand.  This loose soil may have contributed to the sagging of the gate.
Excavation is Complete

While we thought this job would just be a simple re-setting of the hinge post to lift the gate arm, we found that the entire post needed to be scooched to the right about 1.5".  To do this, we set the chain fall between the hinge post and latch post and dragged the hinge side closer with a few quick tugs.

Stabilizing the excavated gate was a bit tricky, and we had a few bad moments as the thing tipped first one way then the other--no photos here, as we had our hands full keeping things together!

Finally we were ready to add fresh concrete to the post.
Pete tends the mixer


Filled to the top.  Note backstay by Pete's foot
After disposing of the first 8 bags, it was clear we were going to need more, so Cosmo headed off to town to pick up 6 more and another 5 gallons of water.  Upon his return, we mixed up the remaining batches and topped off the hole.


Pete sets a sign post.
A few "No Parking" signs between the gate and the road and we were ready to tidy up.  Don joined us for the final hour--he was away checking conditions at Race Brook Falls campsite.  It was quite a tiring day, despite the fact that we were able to park right at the worksite.  Those last 3-4 bags of concrete seemed to be much heavier than 80lbs each.

Monday, August 13, 2012

The Beaver Deceiver......

Aah, those beavers, one must deceive them to avoid flooding the trail and our neighbors property along Rt 7 in Sheffield.  See Adam Brown's report on the mucky business below.

ATC was approached in late fall of 2011 by a business owner whose property abuts National Park Service AT land in Sheffield, MA.  He reported that beavers on the NPS side were flooding his construction yard and threatening to inundate his septic mound.  Both ATC and the AT Committee were aware that flooding was happening on the trail itself and had been in to take a look at the area to see if any immediate solution was available, but were not aware that a neighbor was being affected.  After some discussion between NPS and MA Fish and Wildlife, we came up with several options: do nothing, hire a trapper to remove the beaver and kill it for its pelt (the state does not allow for relocation), or hire a contractor to install a flexible pond leveler (also called a “beaver deceiver”) device.  The first option was likely to alienate the neighbor; the second was harmful to the beaver, so we settled on the third option in hopes of being able to co-exist peacefully with the beaver. 

ATC and the AT Committee pursued a grant through MA Society for the Prevention of Cruelty to Animals (MSPCA), as well as the appropriate town/state Wetlands Protection Act permits, that would allow for cost-free construction and installation of the device by Mike Callahan of Beaver Solutions.  Below is a diagram and description of the device we installed.  We will plan to monitor the area over the fall and into next spring to see if it works.  When we installed it on Friday, water was very low due to the dry summer and the fact that the railroad company had recently replaced their culvert upstream in a way that prevents water at the current level from passing onto NPS land.  This will likely not be the case in a rainy year.   

Mostly Empty Pond, Beaver dam far side of mud hole!
Assemblying the Deciever

Floating the whole shebang into position
Submergence, ready for deception...

Readying the pipe for burial in the dam


So, here's how the whole thing works:


The Flexible Pond Leveler™

Courtesy of Beaver Solutions LLC

May be reproduced


Where flooding from a free-standing beaver dam threatens human property, health or safety, a Beaver Solutions Flexible Pond Leveler™ pipe system can be an extremely effective solution. If properly designed and built, a Flexible Pond Leveler™ will create a permanent leak through the beaver dam that the beavers cannot stop. Our Flexible Pond Leveler™ devices are so effective we guarantee them. They eliminate the need for repeated trapping despite the presence of beavers.

Sorry folks, just can't figure out how to get the diagram to print in this space!

In order for these pipe systems to be effective, they must be designed so that beavers cannot detect the flow of water into the pipe. The Flexible Pond Leveler™ does this by surrounding the submerged intake of the pipe with a large cylinder of fencing. Beavers cannot get close enough to the intake to detect water movement. As a result, the beavers do not try to clog the pipe, and maintenance is rarely needed. A minimum pond depth of 3 feet is needed for the Flexible Pond Leveler™ to function properly.

The height of the pipe in the dam determines the pond level (see diagram). Water will flow through the pipe unless the pond level drops below the peak of the pipe. The pipe is set in the dam at the desired pond level, and can be adjusted up or down if desired.

Unlike road culverts, Flexible Pond Leveler™ pipes do not need to be sized to handle catastrophic storm events because heavy storm runoff will simply flow over the top of the dam. Following the storm the pipe will return the pond to the normal level. Some mild pond fluctuations are possible following very wet periods, but the pond will be controlled at a safe level since the dam height is controlled by the pipe.

When installing a pipe system it is very important to lower a pond only enough to protect human interests. The more a pond is lowered the more likely it is beavers will build a new dam to render the pipe ineffective. Lowering a beaver pond by up to one vertical foot is generally not a problem.

Whenever a pond must be lowered by more than one foot, a single round of trapping may be necessary prior to the flow device installation. When new beavers without the memory of the higher water level relocate to this area they are more likely to tolerate the smaller pond. Most Flexible Pond Leveler™ failures are due to new downstream damming in response to a dramatic lowering of the water level.

 So, there you have it!  Let's hope it works, and Adam, if you get a picture of the pond refilled with our recent rains with the elevation limited by the Beaver Deceiver, send it along and we'll add it to this post!

Great fun in the muck and mire!

Posted by Jim for Adam Brown