Thursday, July 4, 2013

Rock Steps at Kay Wood Shelter--July 2nd, and 9th 2013

On the blue-blazed side trail to Kay Wood Shelter, we have a short section that due to the available terrain, goes directly down hill for about 30 feet before leveling out at the shelter area.

Because it is straight down the "fall line"--directly down hill, the route water takes when flowing over the ground--and due to use (it's the lowest spot along the slope) this short segment collects a fair amount of water and allows it to run quickly.  The combination of volume and speed of water is a guarantee of erosion, creating a nice little gully, that of course hikers want to avoid, which means they walk along side of it, widening the trail and creating another site for more erosion.

The best way to address this issue, is not to let it happen in the first place.  Trails should cross slopes at an angle climbing/descending more gently.  Ideally, 12% is the maximum desired grade for foot trails to prevent water from getting up enough speed to start washing material off the trail.  For some perspective, an interstate highway specification is for no more than a 7% grade.  Another way to think of grade is the amount of "up" you need to cover in a given distance of horizontal travel.  12% is about 1" of up in 8" of travel.  A 20 foot section of trail at 12% would have a rise of about 28 inches.  This is noticeably steep for a hiker, but hikers and trail managers in New England consider this kind of slope a luxury.  Through tradition, or because of limited available land or geology, or just Yankee stubbornness, a 12% trail is pretty rare around here.

So, you have a steep trail and it is subject to erosion, what can you do?  First off is to find ways to get the water off of the trail at frequent intervals so it doesn't build up speed.  Waterbars are the most often used means--channels cut accross the trail, strengthened by rock or timbers--that sluice the water sideways off the treadway and into the woods.  Unless they get clogged with leaves, dirt, or rocks.  Or the rocks that strengthen them are not large enough or set poorly.  Or hikers walk around the ends pounding down the dirt and providing a new route for water to continue down the trail.  As a Maintainer, you can address the first of these shortcomings.  As a Trail Builder, you can address the second.  The third?  Well, that's up to Hikers.  There are vastly more of them than there are of the other two groups.  Just suck it up and go straight over the water bars--don't walk around them...

So, I've got that off my chest, let's talk about rock steps.  When you have no choice but to go stratight down (or up) and the slope is steep, steps are the only answer--and one of last resort.  Steps take a long time to build.  If you want them to last, build from rock--it never rots.  But, you need to have a source of rock that is suitably sized (big), shaped (has at least one flat side, preferrably two or more) and close to the work site.  You need to be able to set this rock deep into the soil and against other rocks so they will never move again.  This takes time and some skills that are best imparted by working with an experienced crew leader.  Surprisingly, you don't need to be a body builder to work with rock--even big ones.  Learning how to use simple tools and (occasionally, but rarely) a modest amount of basic rigging, regular people can move really heavy things pretty much right where they are needed--very slowly.  There is a level of craftwork that needs to be done, but you learn it by doing it.  The work is hard but honest, in the sense that you are dealing with elemental materials and forces.  The satisfaction is high, there's something to look at after a hard day (or days) in the woods.  This thing you have helped to create has an immediate practical value--and if built right, you can show it to your grandchildren.

OK, on with the project.  We had 8 of us at the trail head on Tuesday morning.  A large crew by our standards--and most welcome.  A short hike on a humid morning brought us to the shelter and project site.

We gathered around the blown out section and discussed our options--either by installing new steps directly into the existing gully, or creating the steps on an undisturbed slope immediately adjacent.  Keeping the trail's footprint small by staying in the gully had some appeal, but the exposed bedrock and likelyhood of continuing water problems favored starting fresh, and we were also able to take advantage of a slightly more favorable slope.
Mining crew at work while Don clears a downed trees

For this project, the rock "mining" was pretty simple.  Just up hill was an even steeper slope/cliff, that had produced what looked like a lot of reasonably sized and shaped pieces that would be easy to transport to their new home.

Some rocks are easier to get to than others.
 A good rule of thumb, "if it isn't too heavy to pick up, it's too small".  We wanted the largest rocks that we could find that were still possible to move.  Of course, to be truely useful, the best rocks have a couple of nice flat surfaces.  Soon, what seemed at first to be an abundance of material, was quickly winnowed down into a few really nice, workable rocks, and a bunch of lesser candidates--which we were going to use anyway.

Once pried out of the hillside where they had been sitting since the glacier left,  the next step is to get the rocks down to where they would be set to create a step.  Given the small work site, we did not want to just send boulders down the hill willy-nilly.  Being a bowling pin is not a good thing.

Anita and Jim coax a rock down the hill
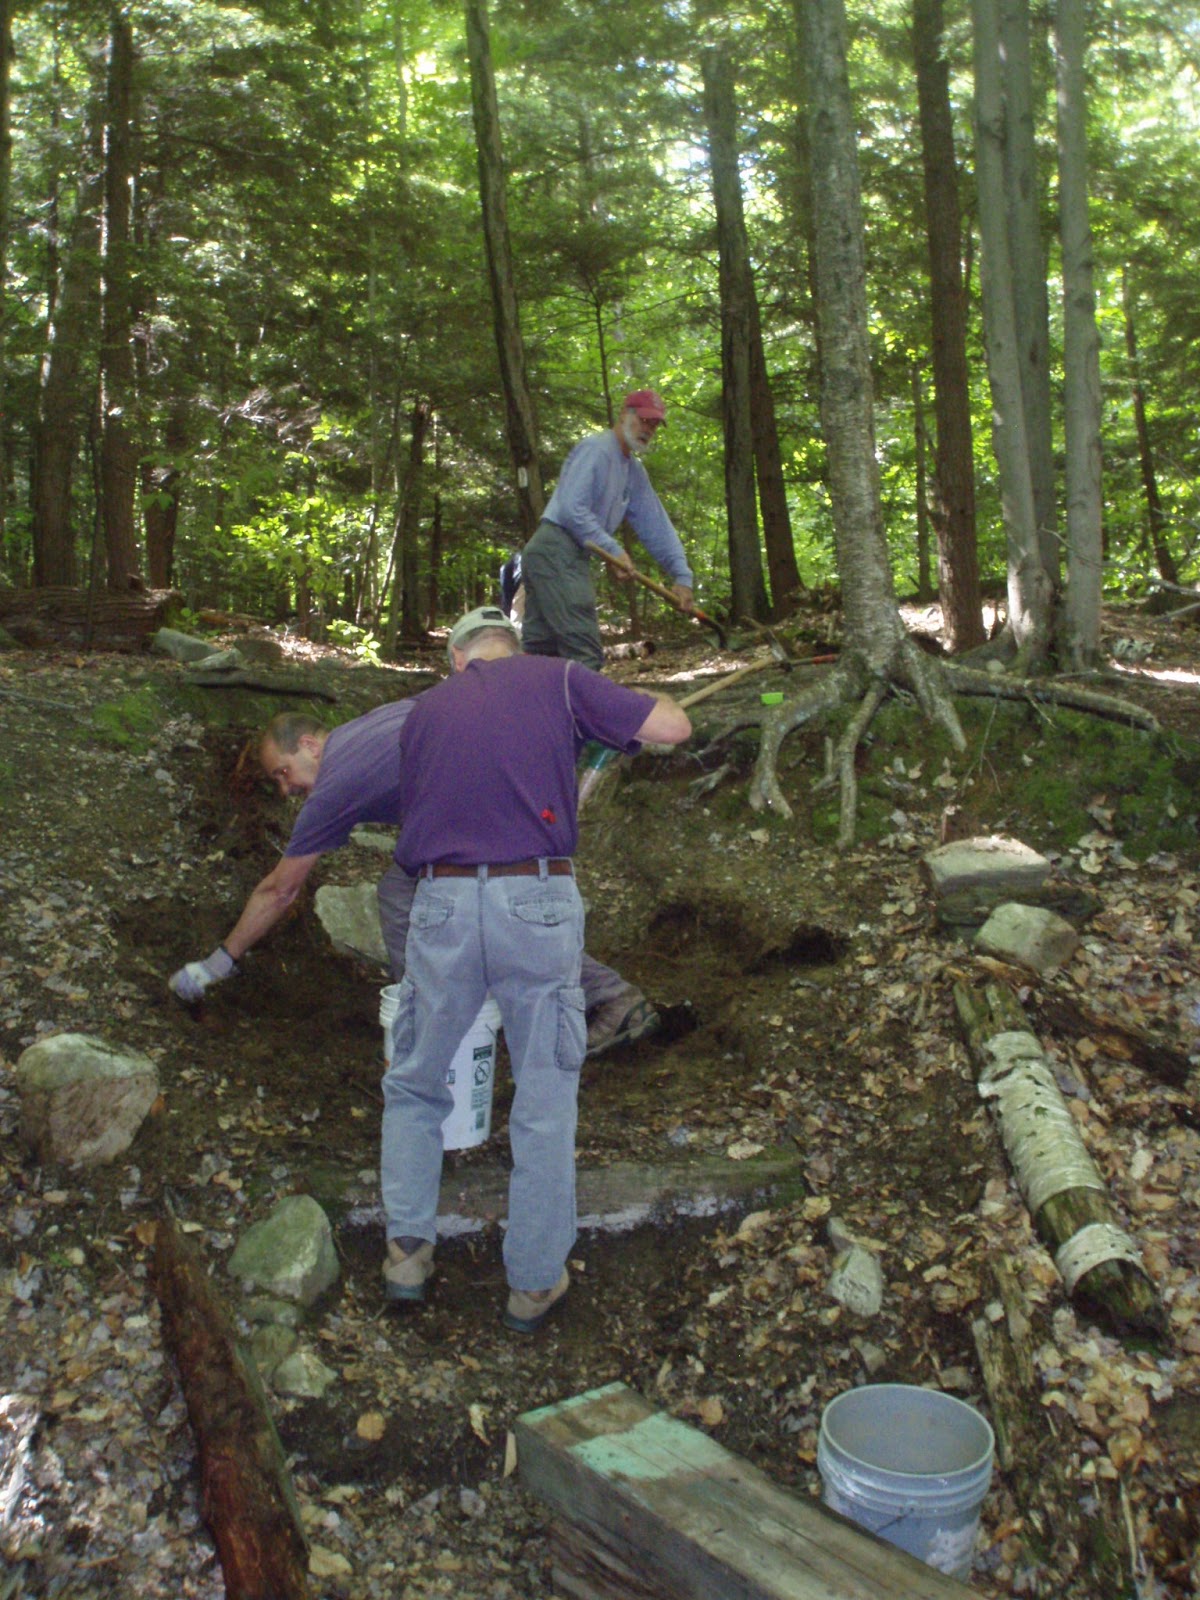
Using a combination of rock bars and pick-mattock, rocks were coaxed/slid/flipped down the hill close to their ultimate location.

To create the most stable stair, each rock should rest on its neighbors below (and in some cases to the sides).   Putting the front edge of the next step onto the back edge of the step below works with gravity to keep everything together.  Simply excavating holes in the soil and dropping rocks in usually results in the rocks creeping downwards or being squeezed out of their position by frost and/or water flow.

Once the bottom rock is set, the slope behind it is excavated to receive the back of the next step.  The art of this process is gauging the size and profile of the excavation to match the incoming rock, and finding the best way to mate the surfaces where the rocks contact each other.
Step number two is landed by Silvia, Dave and Jim.
 More often than not, given our relative inexperience, we had to try several different orientations of the rock to get the best fit, while maintaining a reasonable height of step and level walking surface. 
Don, Jim and Denis coax step number three into place.
If the walking surface of the stair are rounded, slanted or look slippery, hikers will often bypass the steps, continuing the erosion process and widening the trail even further.
Day 1 has 8 steps in place.  4-6 more to go.
To help keep hikers on "the straight and narrow", the sides of the stairs are lined with vertical slabs and the earth on either side of the steps will be covered with "scree" rocks--loosely piled rocks that deter hikers from walking alongside the stairs, increasing the opportunity for more erosion.


Denis and Don install the last few steps
 On Day 2, we landed 6 more steps and installed the vertical slabs and scree rocks.  A few more steps than we had originally planned, but the actual number of steps needed to cover an area depends not only on the slope of the land, but the thickness of the rocks.  Our steps on this project varied from 4" to 8" in height.  At the top of the run, we installed a water bar to direct runoff away from the staircase.
The scree rock is stacked alongside the stairs to reduce walk around.


Work Complete!


Sunday, June 23, 2013

Bog Bridging Gone Wild--June 22, 2013

More Bog Bridging 

 Today's project was to get a large load of bog bridge materials to a work site that was pretty remote (for Massachusetts).  It is a good mile and a half in from the road, and the AT passes over some pretty rocky terrain on the way.  We also had over 75 pieces of lumber to deliver to this distant location.

In previous posts, I've gone into some detail about the why's and wherefore's of installing bog bridges, so the topic of this post is about Transportation.  This particular work site is so far into the woods that we were definitely considering harvesting some nearby trees to use for materials.  However, scouting around we found only a few that were suitable.  They needed to be Hemlock (moderately rot resistant and straight of trunk), have a diameter 12" but not more than 18" (larger would be too heavy to move), and provide enough length for the 200ft or so of trail that needed work.  They also had to be reasonably close to the worksite and have enough room to fell them without hanging up in other trees.  While we did find a few possible candidates, using them would mean that 10 years from now, we'd be in the same situation--but without any suitable trees.

The other issue was that processing (felling, debarking, splitting, transporting, notching and installing) native trees requires a measure of experienced crew power, and we would have needed to devote several project days to this effort--did we really have enough time this season to devote to this one project?

Instead, we decided to use our usual rough-sawn Tamarack lumber and  offer the project to any interested service groups.  Most service groups can put a fairly large number of people into the field on a given day.  While most are not particularly skilled in trail work, they are eager to assist, and enjoy a day outdoors--even if it means carrying pieces of wood and nailing them together in a mud hole.

However, even the most enthusiastic group would find the required 75 3-mile round trips daunting, so we looked for a way to reduce the distance from the materials cache to the worksite.

Our first idea was to make use of a power line right of way that crosses the AT 3/4 mile from the project site.  Scouting this access revealed a cliff between the road and the AT that we would not be able to get the materials over.  However, a few years ago, the local snowmobile club had cut a trail through the woods that bypassed the cliff so they could ride (illegally) on the power line.


Don, Steve and Silvia on the power line
This turned out to be the best approach, so we organized a work party to schlepp the goods to the AT, where the BSA troop will pick them up for a 10 minute walk to the jobsite.

 We decided to use a power wheelbarrow to transport several pieces of wood at once.  This is essentially a motorized, track driven bin that has a pretty light footprint and can travel over forest duff and occasional wet areas little damage to the ground.  It can carry about 400lbs at a time, up some pretty impressive slopes.  It is however, very slow and does not handle rocky or uneven surfaces very well.

Don returning with an empty wheelbarrow

The 3/4 miles of power line travel on existing twin track was not without it's challenges.  After about 3 weeks of rain, the lower areas of the vehicle track are pretty wet.  Muddy water hides two 18" deep trenches left by power company maintenance vehicles.  Stay centered to keep the wheelbarrow from sliding into them.

Climbing a steep slope with a load of planks
 Once in the woods, we followed the old snowmobile trail up the hill to the AT.  We typically have a spotter in front to point out rocks or other obstructions to the operator.  The wheelbarrow has very short ground clearance, and can get high-centered on protruding rocks, or if canted too far to the side, will turn over under the wide, heavy loads we placed on it.
After 6 round trips we got all of the pieces to the staging area near the AT where the scouts will hand-carry them about 1/4 mile further to the work area and install them later this month.

Last load to the drop off point.

In late July, Scouts from BSA Troop 1 in Pittsfield transported and installed all of the materials on the AT.


Tuesday, June 11, 2013

A Hardened Patio for South Wilcox

The new South Wilcox shelter built in 2007 has the usual patio out front under the shelter overhang.  The patio was constructed by building up a rock retaining wall and filling the interior with rocks and mineral soil to create a level area that the picnic table could sit on, under cover of the shelter overhang.  In a project earlier this year we moved the privy at this site, (which had not been moved for 10 years by the way!) and made repairs to the rock retaining wall around the patio. 

So today our project team of Don and I started out with buckets of mineral soil from the pit behind the shelter to level the patio.  We used a long board found under the shelter as a screed to flatten and level the area.  The leveling was done by eye as yours truly forgot to bring along a level!  I would guess we put down a dozen or so buckets of mineral soil to accomplish this part of the job.  Then we mixed buckets of mineral soil with concrete (we had previously lugged in a 94# bag of cement!) in a ratio of 3 to 1 and spread the mix about 1/2" to 1" thick over the whole area.  Lastly it was time to sprinkle water over the whole area and watch the cement set.  Well actually we decided to have lunch! 

Here's what it looks like all done:

We put boards around the patio and posted a sign on the shelter center post asking hikers not to step on the patio until Friday and to feel free to put the picnic table back on the patio at that time.  Hopefully the cement will have set by then.

The idea of this whole effort is to reduce the amount of dirt that gets into the shelter from hiker foot traffic by providing a relatively hard dirt free surface in this area.  It should also make for a surface that is less likely to get uneven and erode.  There is a bit more rock work that could be done to strengthen the corner opposite the stairs but all in all we have a much improved patio. 

We have a number of open project days on our schedule this year.  If this effort at South Wilcox is successful, we may try to make the same improvement at the Noepel shelter later this year.  Anyone got some good ideas on how to lug 94#'s of cement up to Noepel?


Wednesday, June 5, 2013

6/4/13 Timber Steps at Furnace Hill Road

Today we addressed a long-standing problem on the Trail just south of Furnace Hill Rd, in Cheshire.  The trail crosses a deep drainage dip, probably created when the land was logged off in the mid-1900's.  At the bottom of this ditch we built a simple bridge about 5 years ago, but the 12ft climb back up through soft soils has been the site of a number of solutions over the past years, none of which were very satisfactory.

For this attempt, we decided to use large timbers to provide durable steps up this steep slope.  Many years ago, a trail volunteer salvaged some 6x10 timbers from a bridge being demolished in Pittsfield.  For a long time they have sat in the pile of materials adjacent to our toolshed waiting for the appropriate project.

We cut several of the timbers into 5 ft lengths and pulled out all of the old nails that were still embedded in the wood from its previous life.  Being treated with preservative, these chunks were really heavy, probably over 100lbs each.  Fortunately, the project was close to the road and we had a good crew on hand to tote these beasts up the hill.

Once on site, we demolished was was left of a rotting stair made from native logs, and a few of the undersized rock steps that were sliding down the hill.

Clearing out the former steps
Don and Dave started to excavate trenches to insert the new timbers in the lower section, while Denis started on the top two steps.  Sim started on a large drainage dip up hill from the stairs, so water draining down the trail will be diverted, reducing the erosion of the bank that supports the steps.


Setting the timbers
Figuring out at what height and distance to set the timbers was the tricky part, the slope of the hillside varies, and the steps needed to conform to it so to keep a reasonably regular interval for hikers.


Don drives rebar to pin the steps
Denis places rock to secure the timbers
The steps were pinned to the soil with re-bar stakes, but the stakes alone will not be enough to resist the weight of the backfill dirt and hiker traffic, so rocks are set at the ends of the timbers to help stabilize them.  The timbers are also installed leaning back slightly into the hillside.

 Once secured, the gaps between the timbers are filled in with mineral soil harvested from a "borrow pit" dug out of sight of the trail.  Mineral soil is the dirt that is below the soft 'living' layer that supports most of the plant life in the woods.  Mineral soil doesn't contain any roots or vegetation, so it packs down well, and won't shrink over time.  The borrow pit is then filled in with brush and branches to as not to be a hazard to people who are off-trail.


So, you may be saying, "these timbers don't look very natural, why didn't you use rocks, or logs harvested from a nearby tree or two?"  Rocks certainly would have been a longer lasting and more natural looking material, but large enough rocks were not available in this location.  To survive, rocks for steps must be very large, so most of their bulk can be buried in the soil, otherwise they won't stay in place.  The smaller rocks at this location just did not have what it takes.  Locally harvested logs were previously installed and lasted only a few seasons in this damp location.  The treated bridge timbers will last longer, and being close to the road and within sight of neighborhood houses, we did not feel we were diminishing the trail experience for hikers.  Another alternative, building side-hill trail that would switchback up the slope with no structures, was not possible in this location either.  We would need approximately 75 feet of footpath to climb this slope, and AT lands here are very narrow--we would have been well onto the neighbor's property.  So here we are with timbers.

An important final element to the project was the construction of a large drainage dip just uphill from the stairs.  No matter what materials or type of construction we installed, if large quantities of water pour over the steps in heavy rains, nothing will stay in place for long.  The drain will divert water coming down the hill away from the steps.  The local maintainer will need to make sure debris does not collect in the drain--if it is overwhelmed, we'll eventually loose the stairs too.

Just as we were wrapping up, we had our first customer, an NB thruhiker, who seemed to have no difficulty traversing our work.  Apologies for the shovel handle in the picture, my photoshop skills aren't up to removing it.


Cosmo


Wednesday, May 29, 2013

A Tuesday Project Day

Ah, at last, a day without rain!  Our small Tuesday Project team took advantage of the drier weather to tackle a number of problems.  First up was a trip up the Race Brook Trail to remove a large hemlock, duck under blowdown.  Below is a shot of the hemlock (which was much infested with the wooly adelgid by the way) with the branches removed in preparation for bucking.

 With all in readiness, the area checked for dangers and an escape route planned and cleared, Cosmo set his saw to work cutting the trunk off at ~ 20' from the stump. 
 With a bit of persuasion, the deed was done and the root ball was stable enough to keep the trunk up in the air making for an easy cutoff at the root ball.  As you can see below we left the trunk on the trail at the far end, an easy step over.  We did this as Richard, the section Maintainer, intends to use the trunk as a retainer for a retaining wall along this steep side hill section of trail. 

Next we traveled to Goose Pond Rd. and the open area at the trail parking area.  Those black flies were out in force and biting so work was between slaps and waves to deal with the little buggers!  We loaded Cosmo's truck up with a busted up cast iron bathtub and some sheet steel; staked out a good number of rocks and obstructions to be avoided by the brushhog later in the season when we will mow the area; bucked up several deadfalls in the field and lugged the pieces to the nearby piles; and lastly mounted 2 new signs directing drivers to the parking area just beyond the AT crossing of Goose Pond Rd.  Hopefully, with will solve the problem of folks parking on our neighbors grass.  


After one more stop, at Perlman's in Pittsfield to get rid of the scrap metal, we called it a day.  Another satisfying day of Fun in the Woods!

Sunday, May 19, 2013

Season's Opening of Upper Goose Pond Cabin

Yesterday was the day....long awaited by those who love the Upper Goose Pond area and we had a great opening crew of 9 volunteers.  It was a nice warm mostly sunny day for the event that started out as usual with initial opening, removal of the Grumman canoe from the cabin and removal of shutters to let in some light and air.  As this was happening our barge crew of Jim, Mike, Steve and Ellie set to work lashing the canoes together to form a catamaran.  As this year's cargo included a new bear box we needed the capacity afforded by the catamaran. 

Canoes lashed together for large cargo

Once we had transported the cargo from the Leisure Lee dock there was much lugging of the goods up to the cabin.


Above, Steve and Mike carry some heavy loads up the hill.

By mid afternoon we were nearing completion of the opening tasks with all the materials stored, cabin cleaned out, canoes out, water brought over from the spring, gas hooked up and pilots lit, etc.  There sure was an impressive supply of consumables including pancake mix and syrup to store!


Pete brings some supplies into the cabin


Last job for the day was floating and assembling the dock.  With the prep work done by Pete and now having done this a few times it didn't take long to get it all assembled and floating. 
With Mike and Penny's arrival for the first week of caretaking we took our leave and headed back down the hill, satisfied with another great day at Upper Goose Pond.  Pete returned to the cabin today (Sunday) to complete a few jobs and reports that Mike and Penny had a very successful first night with 7 guests! 
Thanks to all who helped out and welcome to Ruth, Michael and Ellie, our newest caretakers who joined in the days efforts.


Thursday, May 2, 2013

Chainsaw Certification

It's a good thing

Saturday April 27th--
5 volunteer sawyers from Massachusetts and two from Connecticut met at ATC's Kellogg Conservation Center for a re-certification of their chainsaw operators skills.

In the dim and distant past (over 10 years ago), just about anyone could drag their chainsaw out of their garage and head into the woods to take out trees that had fallen across the trail.  You can well imagine some pretty scary scenarios, deep in the woods with lots of sharp power equipment roaring away--even without being in Texas.

The AT has an excellent record regarding maintainer safety.   The Trail is a unit of the National Park Service and works closely with the National Forest Service.  Responsible managers from both agencies want to make sure that workers have access to the best possible training and education regarding work hazards they are likely to face on the job--even if they are "just" volunteers.  To that end the Park Service and Forest service require that anyone operating a chain saw on the AT (or cross cut saw--more about this later) must be be qualified to perform the work.  That is, they must know  correct techniques for maintaining and operating the equipment, have the required personal safety gear, and have a clear understanding of the physical forces involved when trees (or parts of trees) weighing 1000's of pounds are cut apart.  This applies also to crosscut (hand powered) saws, too.  Even 'tho the danger of being badly cut may be less, the forces released while cutting are still the same--and must be clearly understood and anticipated.
A volunteer explains to the instructor how he will cut and remove this fallen tree.

As you can imagine, the initial reaction by volunteer maintainers to this "nanny-state" interference with their work was vocal.  In some clubs it amounted to a minor rebellion.  Now, a decade down the road, certification is considered a reasonable and normal requirement by all but a small minority of volunteers.

Speaking personally, I took my first certification course in 1999.  While I was familiar with conventional carpentry tools like table saws and circular saws, I soon discovered I had much to learn and that cutting tree trunks in the woods is a lot different than cutting dressed lumber in the shop. 
A volunteer in the process of cutting a downed tree while instructor Peter Jensen observes her work.    


Truthfully, most volunteers (in a normal year) might go through at most a tank or two of gas operating their saws on the Trail--there just aren't that many situations where a chainsaw is truly needed.  The recent series of storms in New England and the Central Atlantic states have created many more situations where powered equipment is necessary--and there is the potential problem.  Sawyers with limited experience being put in a situation where they literally have days of work required to recover the Trail from storm damage.  In my first certification class in '99, I learned just enough to keep me from cutting my feet off by accident.  4 re-certifications later, I'm fairly competent--but learn new things with every class.  Most importantly, I know when to walk away from a situation that I can't handle.  When the trees trunks are piled like pick-up-sticks from a big storm along miles of trail, it takes a cautious and experienced team of sawyers to get the work done safely.

Sawyers are certified in two skill Classes:  Class A are certified for small limbs and branches in 'non-complex' situations (usually single logs across relatively flat terrain) and are typically first-time operators.  After 3 years, 'A' Sawyers are eligible to re-certify as Class B and take training that addresses more complex situations involving larger trunks and complex interactions between multiple downed trees.  Sawyers of either classification must renew (or 're-cert') every three years.  Class C sawyers are typically professional instructors.
Instructor Peter Jensen (partially behind tree) discusses the cuts needed to fell this tree.

Most trail maintenance situations can usually be handled by hand tools like axes and bow saws--but an understanding of the forces involved when an uprooted tree lies across the treadway makes the work safer and more efficient--regardless of the tools at hand.

Chainsaw operation is pretty rare for most Trail maintainers.  Trail clubs typically have a corps of certified sawyers who are able to tackle specific situations where the regular maintainer may be out of their comfort zone.  Clubs can also bring certified volunteer sawyers to bear when natural events create wide-spread or localized heavy damage.  Only the saw operator needs certification, other can assist by being 'swampers' helping to remove the cut debris under the direction of the sawyer.

The Appalachian Trail Conservancy (ATC) provides funding for volunteers to train and certify with professional instructors and provides funding for all required safety equipment (including those fashionable orange chaps).